Your brakes are the single most important safety system on your vehicle. Yet most American drivers never check their brake pads until something goes wrong.
According to the NHTSA, brake-related issues contribute to approximately 22% of vehicle crashes caused by mechanical failures in the US. The good news? A simple brake pad measurement check takes less than 10 minutes and can save your life — and thousands of dollars in repairs.
What Is Brake Pad Measurement and Why Does It Matter?
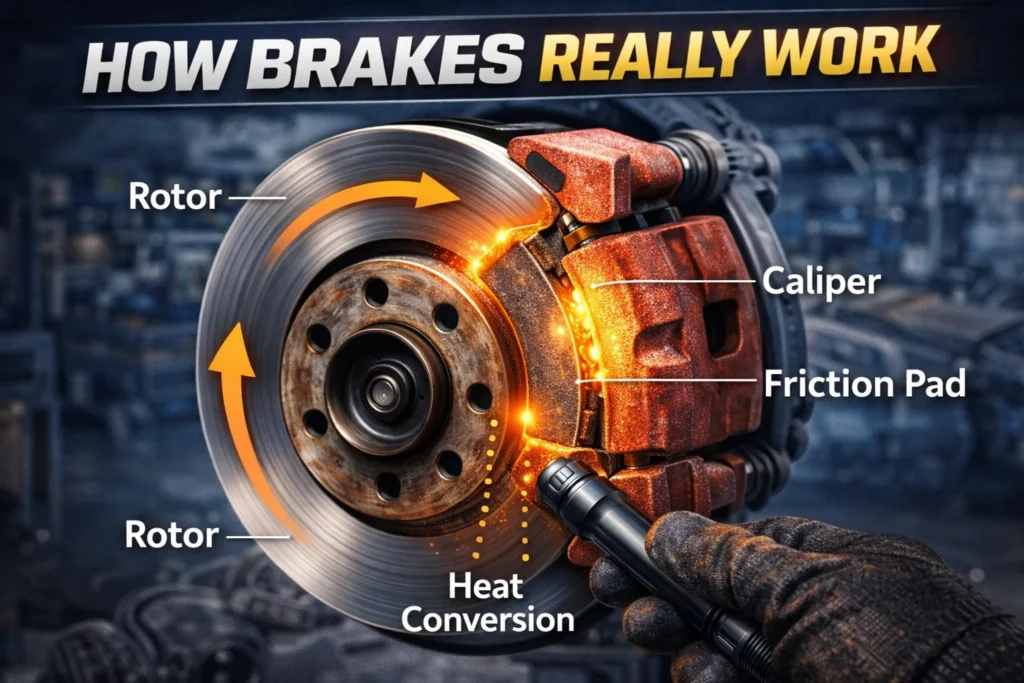
A brake pad is a friction component that presses against your vehicle’s brake rotor every time you hit the pedal. Each pad has two layers: a hard steel backing plate and a layer of friction material bonded on top.
When you brake, hydraulic pressure forces the brake caliper to squeeze the pads against the spinning rotor. That squeeze converts kinetic energy into thermal energy — slowing and stopping your car.
The friction material wears down slowly with every stop. Brake pad measurement tells you exactly how much of that friction material remains — and whether you’re still safe on the road.
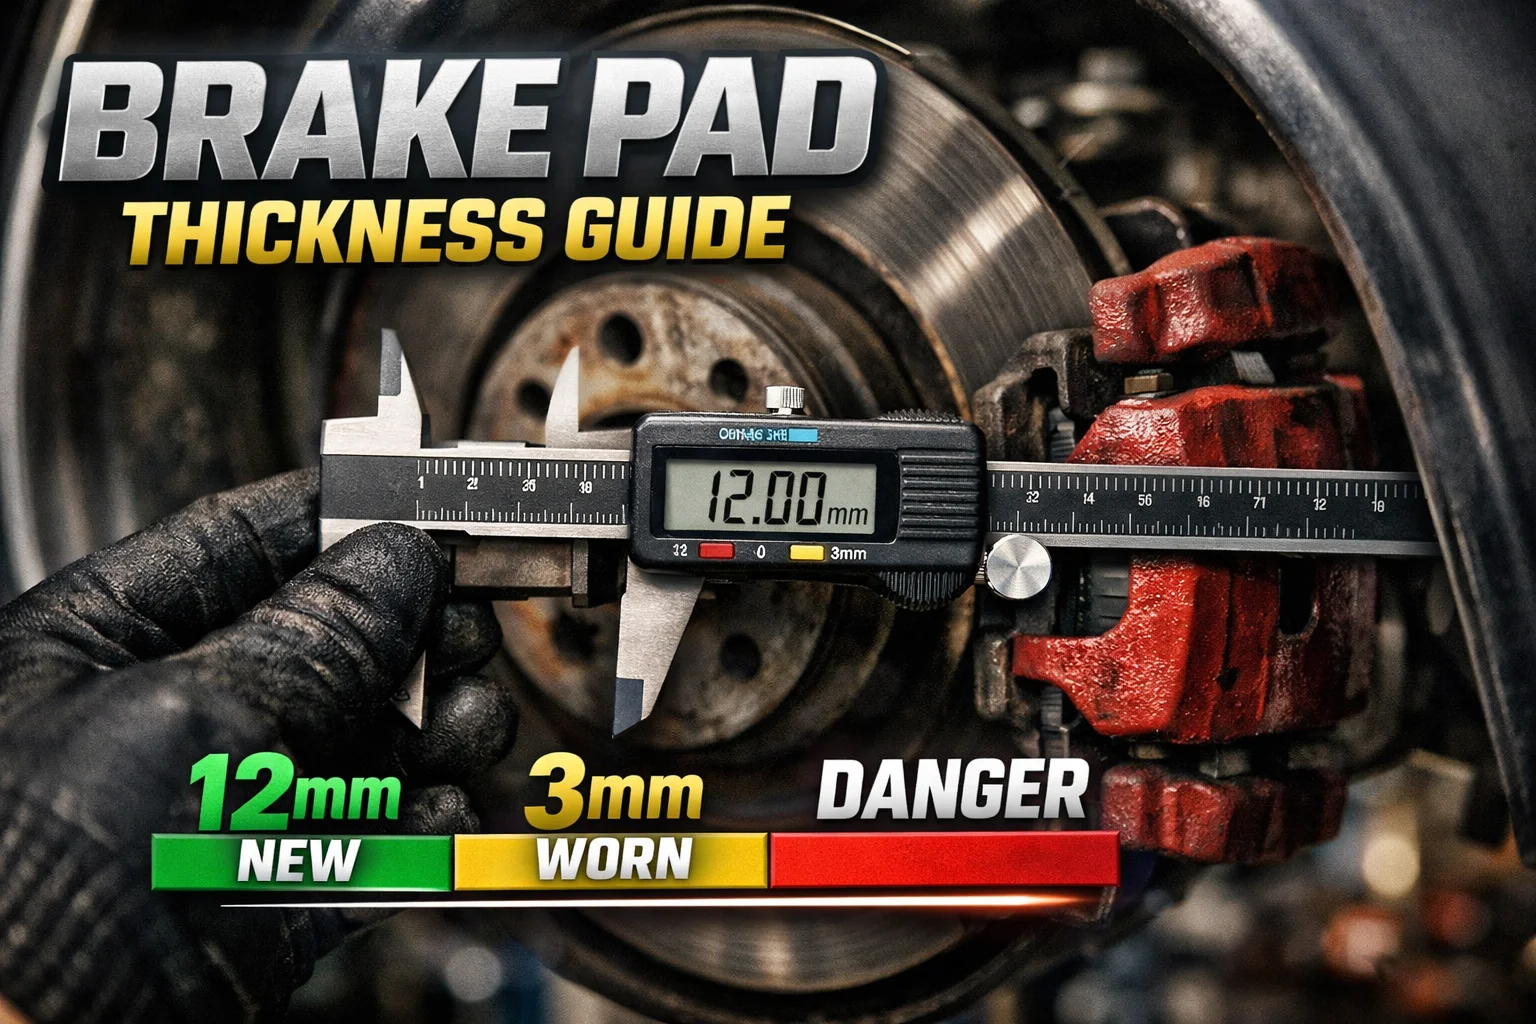
New vs. Worn Brake Pads — What’s the Difference?
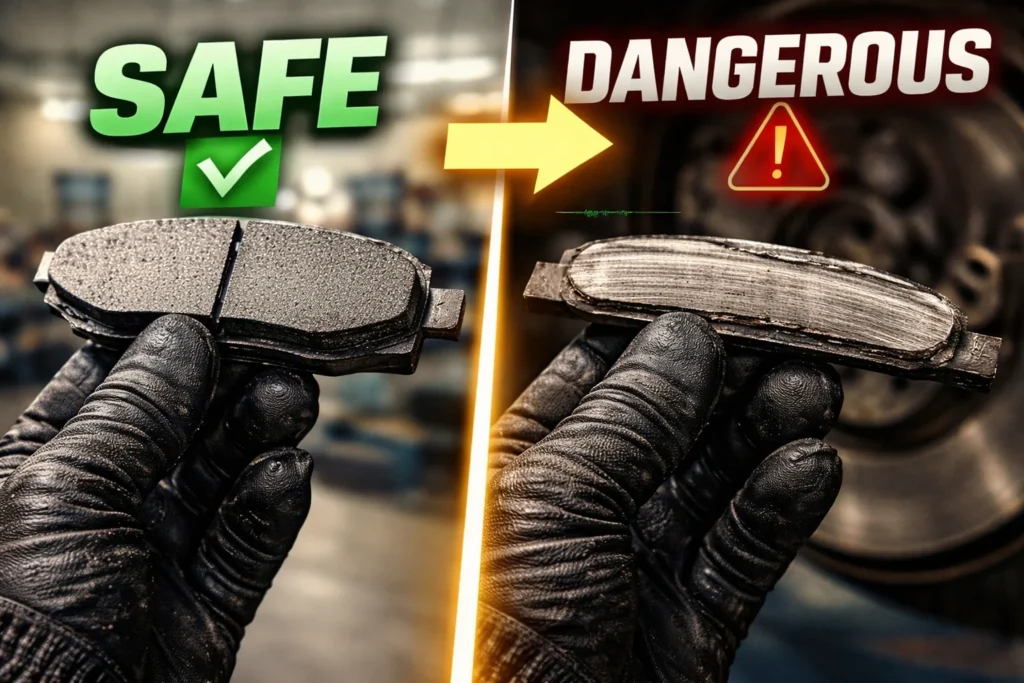
Brand-new brake pads typically measure 10 to 12mm thick on standard passenger vehicles. Performance trucks and SUVs may start at 12 to 15mm to handle heavier braking loads.
As the friction material wears away, braking performance drops — especially in wet or emergency conditions. That’s why knowing your brake pad thickness in mm is a non-negotiable part of vehicle safety maintenance.
One thing most guides don’t tell you: inner brake pads (closer to the vehicle center) typically wear faster than outer brake pads. This is because the caliper piston applies direct pressure to the inner pad first. Always measure both.
Also, front brake pads wear significantly faster than rear brake pads. Front brakes handle 60–70% of your stopping force — especially under hard braking.
| 🇺🇸 US Driving Conditions Matter City drivers in Los Angeles, Chicago, or New York City — with constant stop-and-go traffic — wear through brake pads 30–50% faster than highway commuters. Mountain state drivers in Colorado, Tennessee, or Utah face added strain on descents. Know your driving environment and inspect more frequently. |
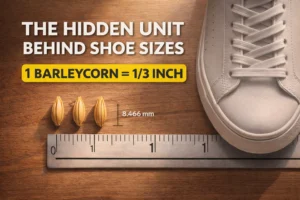
Must Visit: Barleycorn Measurement Explained: What It Is, Exact Size in Inches & Millimeters
Brake Pad Thickness Chart — Safe, Worn, and Dangerous Levels
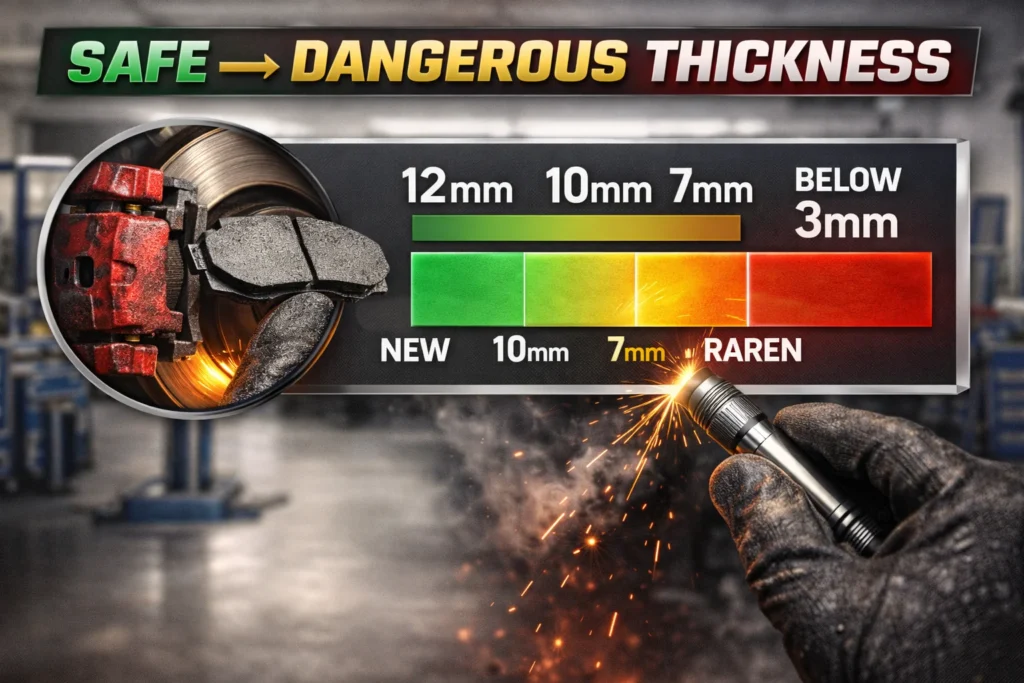
This brake pad thickness chart gives you a clear picture of where your pads stand — from brand new to dangerously worn. All measurements are shown in both millimeters (mm) and inches for US drivers.
| Thickness (mm) | Thickness (in) | Condition | What To Do |
| 10 – 12 mm | 3/8″ – 1/2″ | New / Excellent | Drive normally |
| 8 – 10 mm | 5/16″ – 3/8″ | Good | Monitor regularly |
| 6 – 8 mm | 1/4″ – 5/16″ | Fair | Plan replacement soon |
| 4 – 6 mm | 5/32″ – 1/4″ | Worn | Replace within 1,000 miles |
| 3 – 4 mm | 1/8″ – 5/32″ | Critical | Replace immediately |
| Below 3 mm | Below 1/8″ | DANGEROUS | Do NOT drive |
Pro Tip: Most mechanics in the US recommend replacing pads at 3–4mm. Don’t wait for the absolute minimum of 2–3mm — that eliminates your safety buffer entirely.
If you regularly tow heavy loads, haul cargo, or drive mountain highways, replace your pads at 4–5mm. The extra friction material protects against brake fade — the dangerous drop in braking power caused by overheated components.
How Thin Pads Affect Your Stopping Distance
At 10mm (new), your car stops with full efficiency. At 3mm (critical), your stopping distance can increase by 20–30 feet at highway speeds — roughly the length of two additional car lengths.
In a wet-weather state like Washington, Oregon, or Florida, thin pads are even more dangerous. Reduced friction material combined with a wet brake rotor surface dramatically extends stopping distance and increases accident risk.
How to Measure Brake Pad Thickness — Step-by-Step
You don’t need to be a mechanic to check your brake pad measurement. There are two methods: a quick visual check without removing the wheel, and a precise measurement using a brake pad measurement tool.
Tools You Need for Accurate Brake Pad Measurement
- Digital caliper — most accurate tool; measures in mm and inches
- Brake pad thickness gauge / brake pad measurement tool — purpose-built, easy to use
- Vernier caliper — manual alternative to digital; see method below
- Flashlight — essential for visual inspection through wheel spokes
- Jack + jack stands + lug wrench — required for wheel removal method
- Ruler or measuring tape — basic backup if no caliper available
Method 1 — How to Check Brake Pad Thickness Without Removing the Wheel
This is the quickest way to get a rough idea of your pad condition. No tools required beyond a flashlight.
- Park on a level surface and engage your parking brake.
- Turn your steering wheel fully to one side to open up visibility.
- Shine your flashlight through the wheel spokes toward the brake caliper.
- Locate the brake pad sandwiched between the caliper and the brake rotor.
- If the friction material looks thinner than the steel backing plate — act now.
- If less than 1/4 inch (6mm) of pad is visible — schedule replacement soon.
Important limitation: This method gives an estimate only. For a precise brake pad measurement, you need a caliper and wheel removal.
Pro Tip: A digital inspection camera threaded through the wheel opening can give a clearer view — especially useful during routine oil changes.
Method 2 — How to Measure Brake Pad Thickness with a Digital Caliper or Vernier Caliper
This is the professional method used by mechanics. It gives you an exact number in mm or inches.
- Loosen the lug nuts slightly before lifting the vehicle.
- Lift the vehicle with a floor jack and secure it on jack stands.
- Remove the wheel completely and set it aside.
- Position your digital caliper or vernier caliper — place jaws from the flat backing plate surface to the outer friction material surface.
- Take 3 readings along the length of each pad — start, middle, and end.
- Measure both the inner pad and the outer pad on each wheel.
- Record the thinnest measurement — this is your true remaining brake life.
- Repeat for all four wheels and compare front vs. rear results.
| ⚠️ Expert Diagnostic Notes Thickness variation of more than 0.5mm across a single pad = possible caliper problem. Outer pad more worn than inner pad in a single-piston floating caliper = caliper binding on slides. Both pads on one side worn rapidly = piston unable to retract (check for corrosion or damaged rubber boot). These patterns point beyond the pads to deeper brake system issues. |
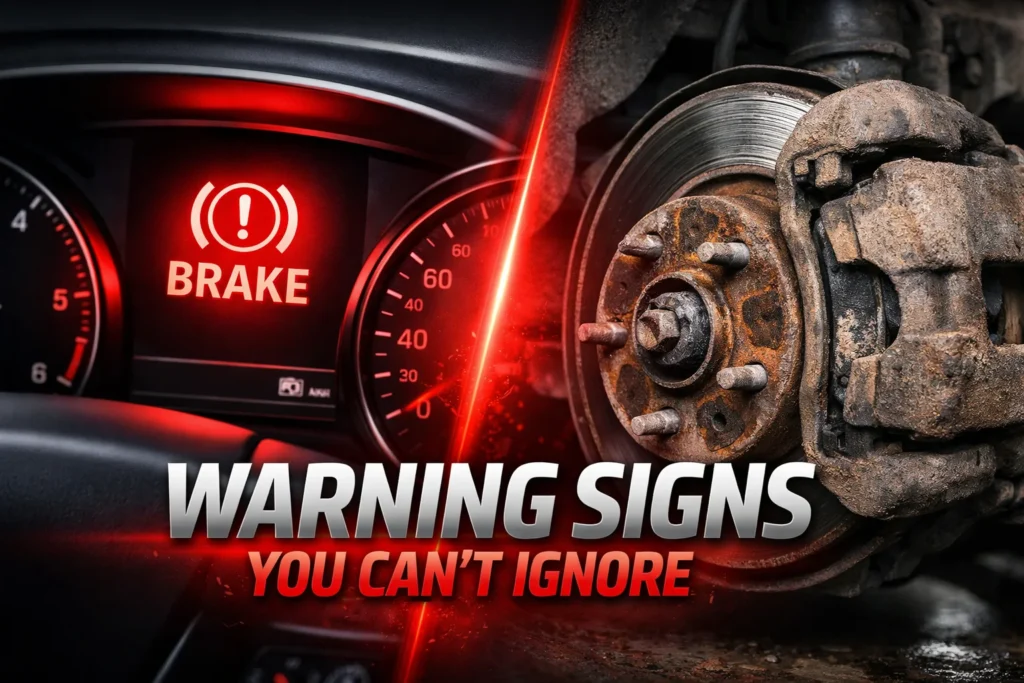
Warning Signs Your Brake Pads Need Immediate Replacement
Your vehicle gives clear signals before a brake pad failure. Here are the warning signs every US driver must recognize — and what they mean.
- 🔊 Squealing / squeaking when braking: The wear indicator tab is contacting the rotor. This is by design — it’s your car warning you. Schedule replacement within a few hundred miles.
- ⚙️ Grinding or growling sounds: Critical. The friction material is gone. Your steel backing plate is now grinding directly against the brake rotor — metal-on-metal contact. Stop driving and get it inspected immediately.
- 📳 Vibration or pulsation through the pedal: Indicates uneven pad wear or a warped brake rotor. Often triggered by overheating from worn pads.
- 🔥 Burning smell after braking: Brake fade — your overheating system is losing efficiency. Common after mountain descents or repeated hard stops.
- 💡 Dashboard warning light: Newer US vehicles have electronic wear sensors embedded in the pads. When the light activates, pads have reached the manufacturer’s replacement threshold.
- ↗️ Car pulling to one side during braking: Uneven pad wear across axles, often paired with caliper issues.
- ⬆️ Increased stopping distance: If your car needs more road to stop than it used to — your pads are likely too thin to generate adequate friction force.
What Happens If You Ignore These Warning Signs?
Worn brake pads are a gateway to far more expensive damage. When the friction material disappears completely, the steel plate scores and grooves the brake rotor. Rotor replacement costs $200–$400 per axle — compared to just $50–$150 for pad replacement alone.
In severe cases, brake caliper damage and brake system failure become real risks. At that point, you’re not just paying for repairs — you’re risking lives.
Brake Pad Measurement by Vehicle — Mazda CX-5, Lexus RX 350 & More
Different vehicles wear brake pads at different rates. Here’s what US owners of two of the most popular crossovers need to know.
How Much Do Brake Pads Cost for a Mazda CX-5?
The Mazda CX-5 is one of the best-selling compact SUVs in America — and its brake pads are reasonably priced to maintain.
- Front brake pad replacement: $150–$250 (parts + labor at an independent US shop)
- Rear brake pad replacement: $130–$220
- Dealership pricing: Typically 20–30% higher than independent shops
- Pad lifespan: 40,000–60,000 miles depending on driving style and conditions
- Recommended inspection interval: Every 12,000 miles or at each tire rotation
City drivers in places like Seattle or Houston who deal with frequent stop-and-go traffic should check their Mazda CX-5 brake pads closer to the 10,000-mile mark.
How Long Do Lexus RX 350 Brakes Last?
The Lexus RX 350 is a luxury mid-size SUV with a strong brake system. Here’s what to expect from pad lifespan:
- Front brake pads: 30,000–50,000 miles (front brakes work harder on most SUVs)
- Rear brake pads: 40,000–70,000 miles
- Electronic wear sensors: The Lexus RX 350 uses built-in brake wear sensors — your dashboard will warn you before pads reach a critical level
Aggressive drivers or those in high-traffic US metro areas will see pads wear toward the lower end of these ranges. A smooth highway commuter may approach the higher range.
How Much Does a Brake Job Cost on a Lexus RX 350?
- Front pads only: $250–$400 at an independent shop
- Full brake job (pads + rotors, all four wheels): $600–$1,200 at a Lexus dealership
- Independent shop full job: $400–$800
Pro Tip: On a Lexus RX 350, replace brake pads at 4mm — not 3mm. Lexus uses larger, more expensive rotors. Letting pads wear to the metal increases the chance of rotor damage — turning a $300 job into a $1,000+ repair.
What Year to Avoid for the Lexus RX 350?
If you’re buying a used Lexus RX 350 and brake reliability is a priority:
- Avoid: 2007–2009 models — documented brake complaints and premature rotor wear issues in consumer reports
- Use caution with: 2013 model — some reports of early brake pad squealing and uneven wear
- Recommended: 2016–2022 models — significantly improved brake system, better wear sensor integration, fewer brake-related complaints
Regardless of model year — always perform a brake pad measurement check before purchasing any used Lexus RX 350. It takes 10 minutes and could save you hundreds.
Frequently Asked Questions About Brake Pad Measurement
What are good measurements for brake pads?
Good brake pad thickness is 6–10mm. New pads start at 10–12mm. At 6mm you should begin planning replacement. At 3–4mm, replacement is urgent. Below 3mm, the vehicle is unsafe to drive.
Is 3mm on brake pads ok?
Technically, a vehicle with 3mm pads can still brake — but it’s at the absolute minimum threshold. Most mechanics and manufacturers recommend replacing at 4mm to preserve a safety margin. If you tow, carry heavy loads, or drive in mountains, replace at 4–5mm without question.
How much do brake pads cost for a Mazda CX-5?
In the US, Mazda CX-5 brake pad replacement costs approximately $150–$250 for front pads and $130–$220 for rear pads (parts + labor) at an independent shop. Dealerships typically charge 20–30% more.
How long do Lexus RX 350 brakes last?
Front brake pads on a Lexus RX 350 typically last 30,000–50,000 miles. Rear pads can last up to 70,000 miles. Driving habits and conditions — especially city stop-and-go — are the biggest factors.
How much does a brake job cost on a Lexus RX 350?
A full brake job (pads + rotors, all four wheels) on a Lexus RX 350 costs $600–$1,200 at a dealership. An independent shop will typically complete the same work for $400–$800.
What year to avoid Lexus RX 350?
Avoid the 2007–2009 and 2013 Lexus RX 350 if brake reliability is a concern — these model years have documented brake system complaints. The 2016–2022 models are the most reliable for braking performance.
Final Takeaway
Brake pad measurement is one of the simplest safety checks you can do — and one of the most overlooked by US drivers. Check your pads every 10,000–12,000 miles. Replace at 3–4mm. Don’t wait for squealing or grinding to act.
Whether you drive a Mazda CX-5 in Chicago or a Lexus RX 350 through Colorado mountain passes — your brake system deserves the same attention you give your tires or oil. A $150 pad replacement today prevents a $1,200 brake job tomorrow.
Stay safe. Measure your brake pads.